A:
Lighting affects camera techniques dramatically, both positively and creatively and a negative and unintentional way. In some films, lighting is used to cover up bad visual effects and unintentional things that happen on set that they cannot change in post.
B:
If the shoot is outside I would have a key light source with a soft-box about 5 feet in front of them. The light would be tall and facing down at them. I will have another small backlight behind the subject so that it lights up behind him and separates the subject from the background. This will also define the subject more. Find a neutral background so that it’s not as distracting and the viewer is focused on the subject. The audio will be captured by using a mic pinned to the subject's body. If we were outside this would be essential as the weather could be unpredictable. An alternative would be to use a boom mic with a cat so that any wind would be unnoticed when listening. I would use a DSLR camera with an f2.8 so that the subject is in focus. The lens would not be wide as I want it to be close up. The tripod height will be eye level to the subject so that it seems as natural as possible.
ISO:
ISO is about how much light is let into the camera lens. Over exposing an image means that you have let in too much light into the camera and the final image becomes really white. For something to be underexposed means that there isn’t enough light so the final image is very dark. When in low light situations a traditional iPhone camera will artificially make the image visible and turn up the ISO to the max. In low light situations, this will ruin the image as the final image will be very grainy, this can be used for experimental purposes to fit an atheistic but most of the time it should be avoided.
I have seen this effect used to fit an aesthetic for an album, the album's themes are very dark and drab. The grain of the video fits the themes of the song and the rest of the album.
The way to avoid a low light image being grainy is to add more lighting on set so that you don’t have to artificially turn up the brightness in post. The more light you have the lower your ISO needs to be. Avoid turning up the ISO, keep it as low as possible so it keeps the image from going grainy.
Examples of different level of ISO:
ISO: 100, Shutter Speed: 1/50, F14
ISO: 1600, Shutter Speed: 1/30, F22
For the ISO 100 shot, there is enough light coming into the lens so that I don't have to artificially raise the brightness with the ISO this makes the image look more realistic. Maybe for this shot, I could have had the camera in better focus, but the ISO in this shot is just the right amount. For the other settings, they could have been changed a little as the image looks a little overexposed and this could have been changed by lowering the shutter speed or changing the aperture to adjust the brightness.
For the ISO 1600 shot, I had to increase the aperture as it needed to match the lighting in the room. The previous 22 wasn't bright enough for the light in the room. Also with the ISO being so high, the darks in the room were very grainy. The noise in the image is because of the ISO being at 1600. In my research, I found the song I BEEN BORN AGAIN and this has similar noise. The reason that in that video it looks good is that it fits with the athletic. The shot in the canteen is normal which should mean that it should be clean and have no noise.

Shutter speed:
Shutter speed is how long the camera lens opens before taking the photo. Very fast shutter speed is typically used for capturing a fast object without any blur. Photographers will use fast shutter speed to capture driving cars, athletes running and any other fast objects passing the camera fast.

On the other hand, slow shutter speed can be used to create weird effects with moving objects. Whenever you are shooting with a very slow shutter speed you will need a tripod to keep your camera grounded and motionless. If you move the camera as it’s into the process of shooting the entire image will be blurry. Slow shutter speed is typically used for an experimental effect. Typically when people use a slow shutter speed they are capturing something that is moving to create a blur effect. Examples of this can be traffic, people walking and other objects moving fast in front of the lens.

Traditionally in photography, that’s what shutter speed is used for but in the film, the cinematographer or director will use this to show distortion and or a dream sequence.
My Shutter Speed examples:
My Shutter Speed examples:
Shutter Speed 1/30. F4.5, ISO 400
Shutter Speed: 1/50, F5.6, ISO 800
Shutter Speed: 1/125, F5.6, ISO 3200
As you can see the motion of the water is different for the different Shutter Speeds.
Aperture:
Aperture means how but the lens opens up while taking the image it is measured by f stops. People typically use a low f stop when doing close-ups or extreme close-ups. When doing this with a low f stop it means that everything around and behind the subject will be out of focus and blurry. This focuses the watcher/viewers attention to one specific object or person.
On the other hand, when a high f stop is used this means that more of what is in the frame will be in the shot and in focus. If you are using a standard lens then you won’t be able to go to the extremes of each of these but if you are using different lenses it will allow you to go to the extreme of each low and high f stop. A wider lens will give you a wider vision. This will increase your vocal range so that more things in the shot will be in focus.
Pull focus:
The pull focus is commonly used in films to shift the attention of the viewer to something in one continuous shot. For example, it can be used in conversation between characters. Frequently used when two characters one in front and one behind are having a conversation
Frame Rate:
Frame rate is how many frames are shown in a second. Since 1927 the standard for video frame rate is 24fps and for TV the standard is 30fps. The higher the frame rate the more fluent the video seems. The reason that 24 frames per second were used as a standard was that that was the maximum frame rate that could be used on the lowest amount of film possible. If they increased the frame rate any more, more film would need to be used. This would have doubled the costing for the film which would have been very expensive. Now that film is digital they don't need to worry about buying extra film but in replacement or buying more film, you will need higher quality equipment plus more space to process the extra frames.

In the future of moving image directors and cinematographers are trying to achieve 48 frames a second throughout at film. 2012 Peter Jackson's The Hobbit was filmed entirely in 48 frames per second and argued that it is a cleaner film as the frame per second is higher. Because of the frame rate being double it captures more stills and gets rid of a lot of motion blur and creates a cleaner looking film. Your eyes see in around 40 frames per second so when you watch The Hobbit at 48fps the film is almost providing too much 'reality'. Viewers described the film to have 'The Uncanny Valley' effect.
T Robert, A Beginners Guide to Frame Rates: Aframe
Different lighting:
Rembrandt lighting:

Rembrandt lighting is when there is a triangle shape under the subjects eye, this effect is used so that there is a variety of shadows on the subjects face. It is a fairly simple technique that is achieved by only using two light sources.

Butterfly lighting:

Butterfly lighting is set up with the backlight above the subject facing down on their head to create a butterfly shape under their nose. This effect is commonly used to achieve a glamorous effect to the subject, this set up also smoothens out the subjects face to eliminate wrinkles.

Split lighting:
Split lighting is typically used in the film to portray someone with a split personality. It is an easy representation that is easy to recreate. It is used heavily in films to portray a split personality and or something that is wrong with the character. This technique is easy to achieve and is very effective if executed right.

Lighting Techniques with film examples:
Health and Saftey on set:
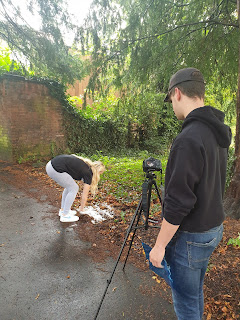
 When shooting outside the weather should always be something that should be taken seriously. Water on an unprotected camera will break it. That's why when shooting you should check the weather forecast as it could affect your shoot if you don't come with the correct equipment. Keeping yourself is as important as keeping the equipment safe. You need to make sure that you're wearing the correct clothing for the weather. For example, when we were shooting our new wave film we decided to bring someone so that they could hold a coat over the camera in case it rained.
 Making sure that you aren't missing deadlines is important but making sure that you aren't rushing the work to complete it. Making sure that you are focused on managing your time well is key. You need to make the conscious decision on whether or not to take another day to film the rest of the work instead of rushing to complete it all at once and cutting corners. For example, when I was filming my new wave video I needed more footage for the train ride section so I decided to wait until the following day when I was on the train again to get more footage.
Filming with illusion, if you know that you can create something without the risk of doing it then you should. Whenever you have an idea for a shot that can be done in post then depending on the thing you should do it.
More on illusions in filming.
 Example: a scene about bullying. The victim stands alone, the bullies advance. We see a shot of the victim's face, scared. We see the victim's point of view as the bullies crowd round. We see a shot from a distance as the victim is finally surrounded, the camera tilts up to the sky, a lovely sunny day, birds sing, we hear the SOUND of the bullies thumping our victim. Cut or Fade to the aftermath, victim sitting crying in a heap on ground, or in hospital bed, headmaster's office - wherever you wish to take your story next..."
All References: More on illusions in filming.
"Remember filmmaking is about illusion. You can act, shoot and edit in a way that suggests all sorts of scary things without having to put people at risk.
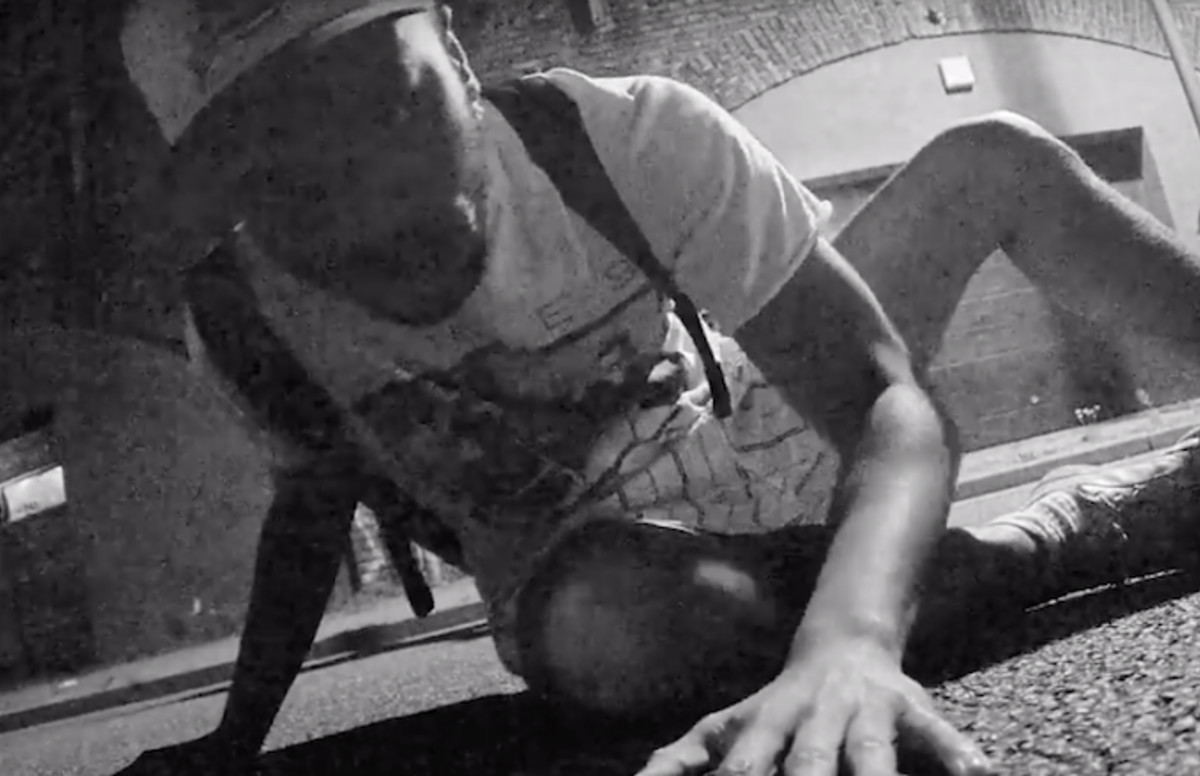
Someone at height can be faked by lying on the ground with the camera looking up at someone with only sky behind them, acting as if they are on the edge of a great height.
Young people often want to depict violence, with or without weapons. This can get out of hand and lead to real injury. The safest way to deal with violent scenes is to suggest the violence, or show the aftermath but leave the detail to the viewer's imagination.
 Example: a scene about bullying. The victim stands alone, the bullies advance. We see a shot of the victim's face, scared. We see the victim's point of view as the bullies crowd round. We see a shot from a distance as the victim is finally surrounded, the camera tilts up to the sky, a lovely sunny day, birds sing, we hear the SOUND of the bullies thumping our victim. Cut or Fade to the aftermath, victim sitting crying in a heap on ground, or in hospital bed, headmaster's office - wherever you wish to take your story next..."
T Robert, A Beginners Guide to Frame Rates: Aframe
J Guyer, 10 Photography Lighting Tutorials From Beginners to Pros
Health and Saftey I Moving Image Education
Notes from class


No comments:
Post a Comment